
Welcome to my stop on the ESAD Holiday Catalogue 2018 Blog Hop, if you’re starting here or joining me from Rochelle’s blog, again welcome!! Today’s blog hop we’re featuring products from the brand new Stampin’ Up! 2018 Holiday Catalogue.

For my stop I have created three cards all featuring the Merry Christmas To You Bundle from the All Is Bright Suite.
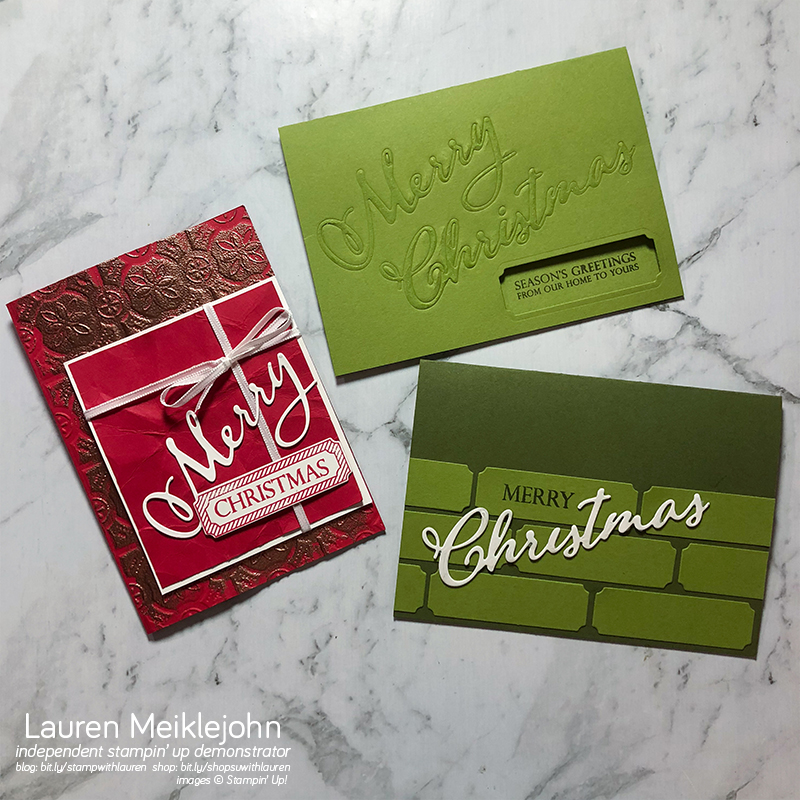
For my first card I went simple…

Starting off with an Old Olive card base, I die cut out the larger frame from the die set in the bottom right corner of the card front. Then using the Big Shot Embossing Mats, I embossed the ‘Merry’ and ‘Christmas’ also from the die set. I went over the embossing with Clear Wink of Stella. Finally I stamped the sentiment from the Merry Christmas To You Photopolymer Stamp Set in through the cut in Mossy Meadow.


Here is my second card…
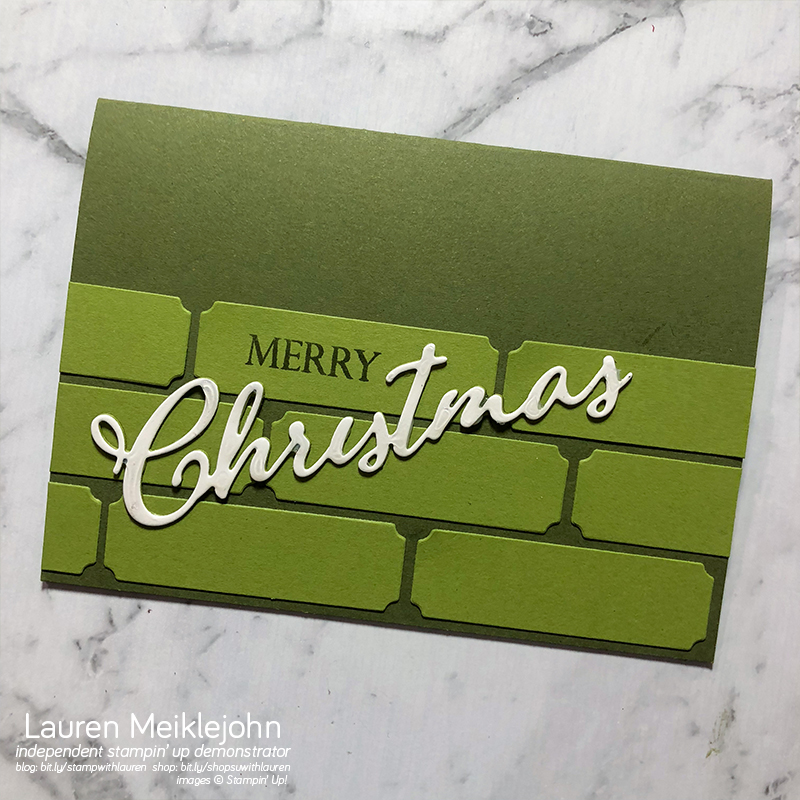
This card starts off with a Mossy Meadow card base. I then cut out seven of the larger frame in Old Olive Cardstock, adhering them down with Tear & Tape Adhesive. I cut off the excess and reused them where necessary. I stamped the sentiment in Mossy Meadow. I die cut out two lots of ‘Christmas’, one in Whisper White and the other in Old Olive. I adhered them together with Multi-Purpose Liquid Glue. Then over the top layer with Fine-Tip Glue. Once dry I adhered it to the card front with some more Multi-Purpose Liquid Glue.


For my final card… I went with a Real Red card.

I started off with a Real Red card base, I embossed the card front with the Tin Tile Dynamic Textured Impressions Embossing Folder. Once embossed I went over the top with Versamark Ink and heat embossed with Copper Stampin’ Emboss Powder. Then I took a piece of Whisper White Cardstock, layering on top a piece Real Red Cardstock that I scrunched, adhering together with some Tear & Tape Adhesive. I tied the piece of Whisper White Sheer Ribbon around to look like a present. I secured the bow in place with a Mini Glue Dot. Then adhered it to the card base with Stampin’ Dimensionals.
I stamped the frame stamp and the sentiment in Real Red ink, then die cut out with frame die, adhering it to the card with Stampin’ Dimensionals. I also die cut out two ‘Merry’, one in Whisper White and the other in Real Red, layering together and to the card with Multi-Purpose Liquid Glue.


I hope you like my three cards all featuring the Merry Christmas To You Bundle, for the full list of supplies it’s right at the end of this post. Next up is Rose, my wonderful Aunty and Upline!!
Until next time… Happy Stampin’,
Lauren

- Lou Kitzelman
- Kim Oliver
- Nicole Wilson
- Delys Cram
- Katrina Duffell
- Peta Stephen
- Cathy Pinchbeck
- Barbara Williams
- Libby Dyson
- Jo Stubbing
- Fi Cobbin
- Rebekah Crisp
- Jenna Watkins
- Rachael Lewsley
- Jenny Hayward
- Rochelle Blok
- Lauren Meiklejohn
- Rose Packer
- Monique Fielder
- Maree McIntosh
- Sandra Mastello
- Amity Knight
- Sharon Dalton
- Narelle Fasulo
- Sharni Haines
- Rebecca Scurr
If you enjoyed this post, please be sure to…
- Receive three FREE Exclusive PDF tutorials + PDF tutorials of my card created for this blog when you subscribe to my newsletter here.
- Check out the Clearance Rack and save up to 60%.
- Save 10% on coordinating product bundles.
- The $169 Starter Kit is the best deal of any catalogue! Check out the Discounts & Benefits here.
- Follow me on Instagram, Facebook & Pinterest.
Love this card? Save it to your favourite Christmas card Pinterest board!


Supplies Used:
Stamp: Merry Christmas To You Photopolymer Stamp Set (Merry Christmas To You Bundle)
Cardstock: Whisper White, Old Olive, Mossy Meadow, Real Red
Ink: Mossy Meadow, Real Red, Versamark
Accessories & Tools: Big Shot, Big Shot Embossing Mats, Merry Christmas Thinlits Dies, Tin Tile Dynamic Textured Impressions Embossing Folder, Heat Tool, Embossing Buddy, Copper Stampin’ Emboss Powder, Paper Snips, Whisper White Sheer Ribbon
Hidden Bits: Tear & Tape Adhesive, Stampin’ Dimensionals, Multi-Purpose Liquid Glue, Fine-Tip Glue, Mini Glue Dots


Lovely cards, very fresh and crisp!
LikeLiked by 1 person
Thanks Sharni!!
LikeLike
Wow, these are great ideas, Lauren. I may have to use 1 or 2 of them myself. Thanks for sharing and hopping with us
LikeLiked by 1 person
Thanks Libby, Glad I could inspire you!!
LikeLike
Love the faux tin foil with the embossing. Love it.
LikeLiked by 1 person
Thanks Amity!
LikeLike
These are really cool cards Lauren. I love all the different ways you have done them. Very clever! Thanks for sharing them. 🙂
LikeLiked by 1 person
Thanks Jenny!!
LikeLiked by 1 person
thanks for sharing these great ideas
LikeLike
Lovely cards Lauren!
LikeLike
Great cards Lauren, I particularly like the last one with the scrunched Real Red present.
LikeLiked by 1 person
Three gorgeous cards Lauren! Love the embossing of the thinlits words for a fun background layer and the copper embossing powder over the Tin Tile embossing makes for a gorgeous vintage look, especially over the Real Red colour. Thanks for sharing your fabulous ideas. Rochelle xo
LikeLiked by 1 person
Thanks Rochelle!!
LikeLike
Such a great variety of cards from few supplies, lovely!
LikeLiked by 1 person
Fantastic and creative ideas Lauren. They all look wonderful. TFS
LikeLiked by 1 person
I love all the clever ways you have shown how to use this great bundle Lauren. Thanks for adding it to my list!
LikeLiked by 1 person
Thanks Lou… Glad to be an enabler!
LikeLike
I really like these Lauren, they are fabulously festive xo
LikeLiked by 1 person
Thanks Katrina!!
LikeLike
Love how you stepped it up from one to the next, great cards!
LikeLiked by 1 person
Thanks Sandra!!
LikeLike
Love these cards Lauren. Especially the double embossing – nice one, may have to case you on this!
LikeLiked by 1 person
Thanks Rose!!
LikeLike
Lovely cards, Thanks for the inspiration.
LikeLiked by 1 person